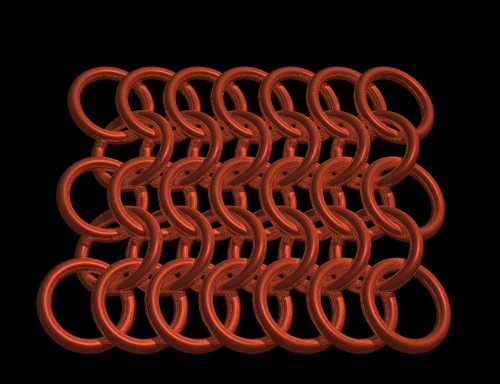
European 4-in-1 is typically the starting point for new maillers. It's an easy weave to pick up and one that weaves
fairly quickly. The European category is also the historical foundation for chain mail armor whether in butted rings or
flat riveted. If some one's seen chain mail before it'll usually be a European variation.
4-in-1 means that every link in the pattern goes through four other links. If the link you're adding goes through two
links on the existing pattern, then it must also go through two new links - one link through a total of four others. If the
link you're adding goes through three links on the existing pattern, then it must also go through one new link - again, one
link through four others.
There are many variations of the Euro pattern. For example, Euro 6-in-1; every link in the pattern goes through six others.
This produces a denser weave than the Euro 4-in-1. Or Kingsmaille which is European 4-in-1 but each ring is doubled. Depending
on the AR of the rings used, items have been made from Euro 12-in-1.
The colors used below are shown for clarity of instructions. Typically your mail will be all one color depending upon the
metal you use.
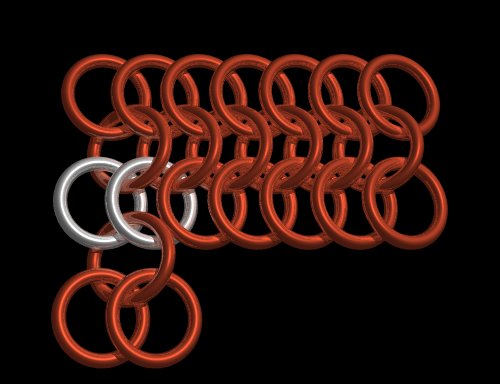
Starter rows (1-3)
- Place an open ring, the silver colored ring, through four closed rings and close the open
ring.
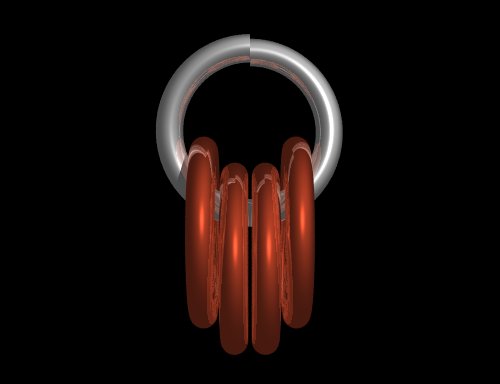
- Arrange the five rings in the following pattern with the silver ring point to the left.
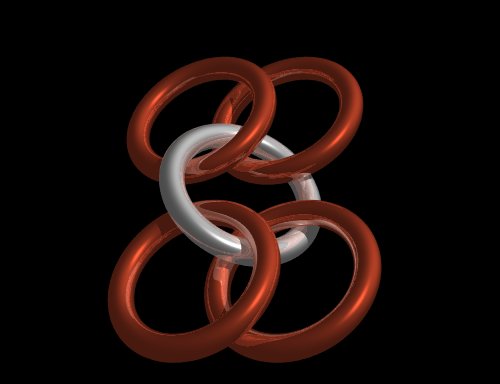
- Place an open ring through two closed rings. Place the open ring of the set through the two rings
colored silver from the previous step. Close the open ring.

- Repeat step 3 to make the pattern longer.
Adding additional rows (2 at a time)
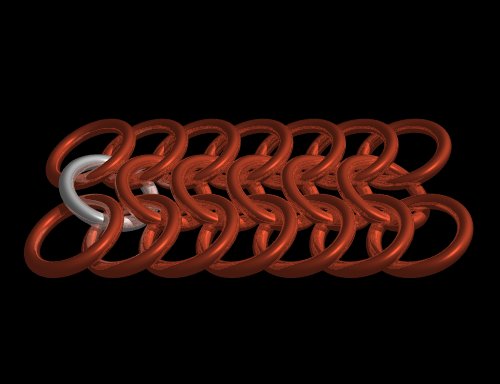
- Take the completed three-row group from step 4 above and rotate 180 degrees in either
direction.
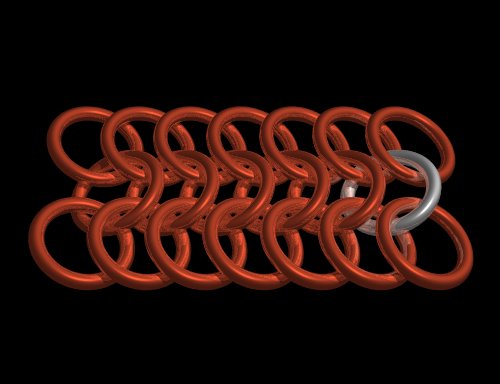
- Place an open ring through two closed rings. Place the open ring through the two edge row rings
colored silver. Close the open ring.
- Place an open ring through a closed ring. Place the open ring through the three rings colored
silver. Close the open ring.
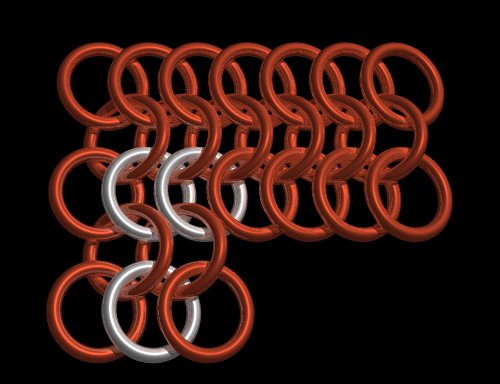
- Repeat step 3 to the end of the pattern.
- Repeat this process for any desired size of European 4-in-1 mail.
The European patterns based upon the above method naturally contracts and expands in the left/right direction while the
up/down moves very little. Keep this in mind when weaving any type of clothing to determine in what direction you wish
the contraction/expansion to flow.
European patterns are the basis for a wide range of items. Armor being the more obvious from shirts to coifs to bracers,
if it can be worn, it can usually be made from an European pattern.
It's in the area of jewelry that European patterns are often overlooked. Simple yet elegant necklace chokers and bracelets
can be made from this pattern. Variations on earrnings in diamond patterns are made from Euro weaves. A favorite made from
European 6-in-1 are mens and women's belts.
It's best to use this weave as a starting point to learn how to chain mail. It contains all the basics steps needed along
with being a simple weave for beginners. Other weaves can be difficult to start and often discourage beginners. As long as you
follow the instructions above with the rings laid out as shown, you should have little difficulty picking up European 4-in-1.
Though not a project in this class, if you take the three-row group created from the Starter rows (1-3) above
and extend it out to necklace length, you've just created a simple choker necklace.
You'll find other variations on how to weave this pattern. There is no right or wrong method. Some are faster than others
such as the speed weaving method above while others weave top to bottom instead of left to right. Even this method can
be reversed to add rows left to right but bottom to top instead of top to bottom. What works best will depend on several factors
such as how dextrious you are with both hands, whether you're left or right handed, or even what you're making. The best method
is the method you are most comfortable with that fits your unique style of weaving.