Ring Parts and How to Weave
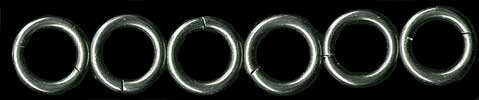
There are four basic parts of a ring:
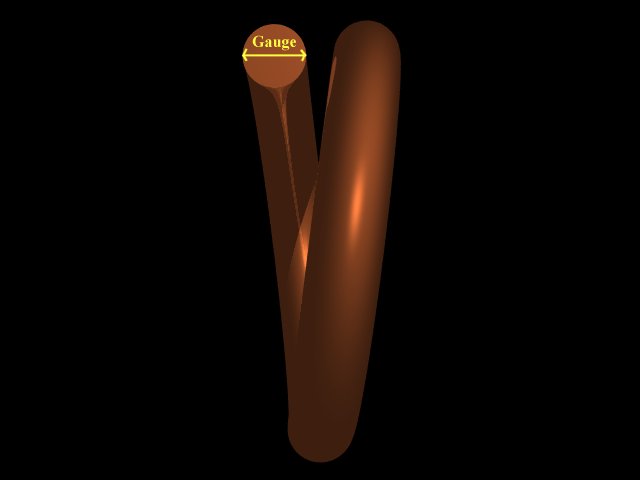
- Gauge - the diameter or thickness of wire
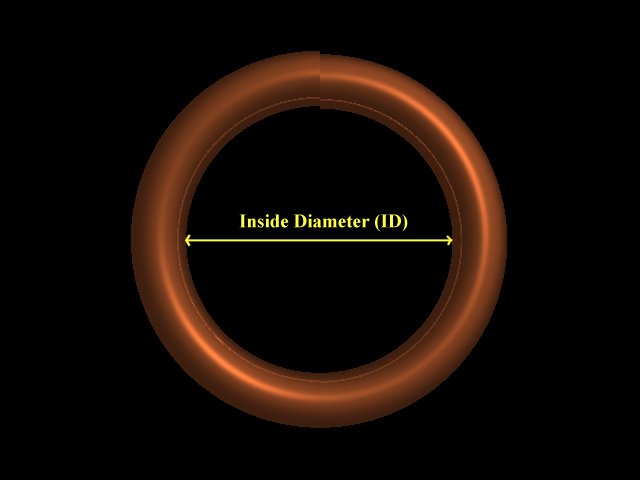
- Inside diameter (ID) - the distance across the inside of a ring excluding the gauge
- Aspect Ratio (AR) - ID divided by the gauge, both represented as decimals
- Cut
- Pinch
- Sheer
- Machine cut
- Saw
When referring to a ring, you only need to state two parts, gauge and inside diameter(ID). For example, if you need
a Ľ" ring that's 18 gauge in the SWG system, the preferred method is a Ľ" - 18 SWG. This gives you all the information
you need to specify the ring.
Most people use this method to some degree whether they specify the gauge first or last or specify the gauge as a
decimal in inches or millimeters. You have to be careful because a lot of people and websites do not
specify the gauge system or if they use a decimal they don't always specify if it's in inches or millimeters. For the
purposes of this class, gauge will always be specified with the system or the decimal with the type. Examples; 1/8"-20AWG,
5/16"-14SWG, 3/32"-.028", or 3/8"-2.03mm.
All parts of a ring are important in different ways and should be taken into consideration when selecting rings to use
on a particular project. To get a better idea of what each part is, further explanation follows.
Gauge is the thickness or diameter of a piece of wire. The smaller the gauge number, the thicker the wire or
the wider the diameter. There are three main types of wire gauge measurements; British Imperial Standard (SWG), American
or Brown and Sharp (AWG), and AWG Metric. There is a difference of approximately two gauges between SWG and AWG. For
example 14 AWG(.0641") is almost the same as 16 SWG (.0640"). It's best to purchase a cheap caliper and measure the wire's
thickness yourself and then lookup the appropriate gauge in decimal form if unsure.
Inside diameter (ID) is the diameter of the ring measured on the inside from side to side. The gauge of the
wire used is not part of the ID. The ID determines the ring size. If a project calls for a 5/16" ring that means
that the inside diameter of the ring, when measured across, is about 5/16". "About" because most metals when coiled on a
mandrel, and then taken off, "spring" back to some degree slightly widening the ID. The ring size is taken from the
diameter of the mandrel used to coil the wire to make the rings and not the actual diameter after springback.
Aspect ratio (AR) is the ratio of the inner diameter divided by the gauge, in decimal form. Make sure both the
inner diameter and gauge are in decimal form and both are specified in either inches or millimeters. This is a
"dimensionless" number. It gives you a number that represents the gauge compared to the inside diameter which helps
determine how to size up or down rings for a given project that was done in another ring size. When calculating the next
ring size up or down, the aspect ratio will not always come out exact. As long as the number is within about 10% of the
ideal number, it should work.

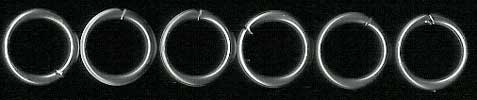
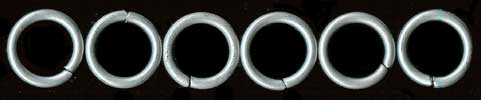
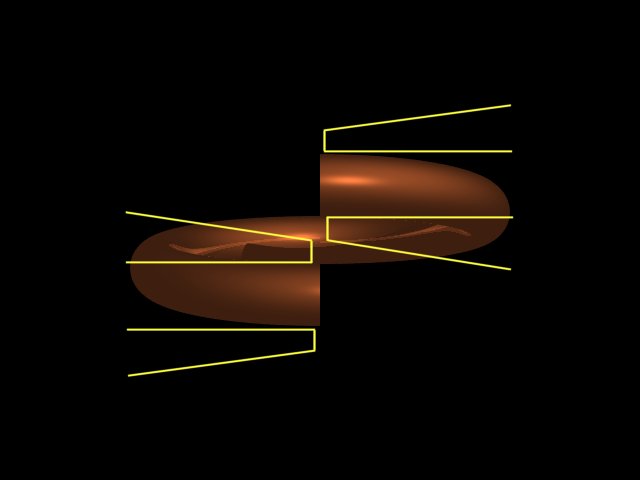
Cut is the type of cut produced when a ring is cut from a coil made from wire. There are four types of cuts made by tools:
- Pinch
- The pinch cut produces ends of the ring that look like this ><. The ends are literally pinched together into points. The pinch cut is typically produced from hand tools such as a wire cutter.
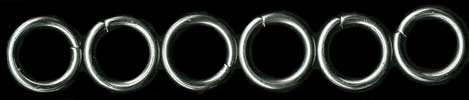
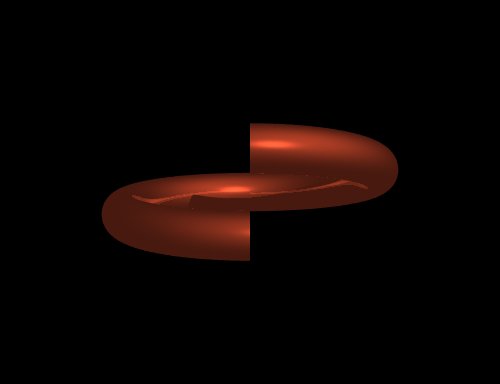
- Shear
- A shear cut produces a diagonal slice, //, but the ends don't perfectly match up and sometimes the rings
become deformed during the cut. The shear cut is also typically produced by a hand cutter that shears the metal.
This type of cut is better than a pinch cute but not as good as a saw cut.
- Machine cut
- A machine cut is produced by an industrial machine that's made to coil and cut rings. The cuts are
typically a combination of the pinch and shear cut. Overall, not a bad cut though still not as good as a
saw cut.

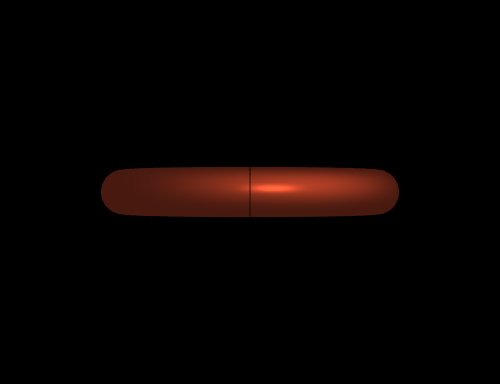
- Saw cut
- This cut is produced by a saw whether done by hand or machine. This is the best cut as the ends line
up flush, produce a clean cut, and close the best. This type of cut ring is also the most expensive type
of ring to purchase.
Ring materials
The choice of metals will depend upon the type of project
you're making and for what use the project will be put. For example, you might make a bracelet out of sterling silver
while a hauberk or coif used for combat purposes would be made from steel. Each metal or alloy has it's own unique
properties such as strength, corrosion resistance, temper, etc.
An alloy is a metal made from two or more metals. Brass is an alloy of copper and zinc.
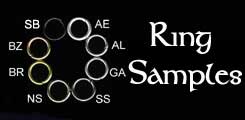
These are the most common metals used in mailing and under what circumstances:
Aluminum
Aluminum weighs 1/3 as much as steel meaning that you get 3 times as many rings per pound. Though the price for
aluminum is higher, on a price per ring basis, aluminum is about the same cost as galvanized steel.
Aluminum is suitable for a wide variety of uses from combat grade armor to delicate jewelry. It's excellent for
pieces that need to be light such as costume pieces. Combat grade chain mail should be made from a slightly smaller
rings or larger wire than steel armor. The resulting armor will be as strong as galvanized steel and it will be
stiffer (more protective) plus it will be lighter. Aluminum is also the material of choice for women's chain mail
fashions. You'll find aluminum comes in four different types:
- Aluminum (Jewelry, Armor)
Aluminum typically leaves a blackish residue on whatever it touches.
After handling your chainmail, your hands will be dirty. This residue is aluminum oxide. You can clean it off
but it'll keep coming back. As the oxide builds up, the aluminum turns a darker gray color. There are two
things that can be down to permanently prevent aluminum from oxidizing - anodizing and etching. The best alternative
is to buy bright aluminum. Bright aluminum has been drawn into wire with a smoother surface finish than
other aluminum. This makes it shiny and it does not leave as much black residue, if any.
- Etched aluminum (Jewelry, Armor, Clothing)
Etching is a cost effective method for getting
clean aluminum. This process uses dangerous chemicals and it's recommended you buy pre-etched rings or wire.
Etched aluminum varies between dull light gray to white in color and the color may not be uniform.

- Bright aluminum (Jewelry, Armor, Décor)
Bright aluminum is clean, shiny, and resists oxidation.
There is little to no noticeable black oxidation to rub off. The brightness varies. The longer the metal's
been in open air, the less shiny it'll eventually become.

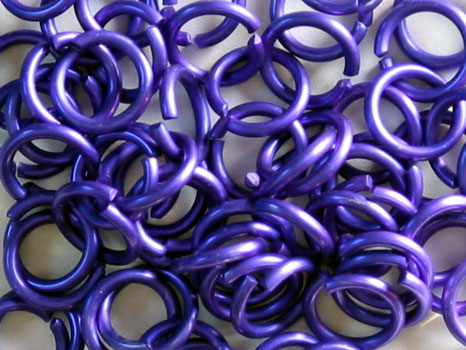
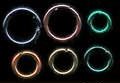
- Anodized aluminum (Jewelry, Armor, Clothing)
Anodized aluminum comes in a wide variety of colors.
The coating is fairly hard but can be scratched with steel. Use pliers without teeth to avoid scratching. Rings
are typically anodized after they're cut so the ends are coated as well. Batches of rings tend to vary slightly
in color.

Brass (Jewelry, Armor, Trim)
Brass is excellent for trim and jewelry. It's a shiny yellow color but turns a duller, darker color as it
oxides and can turn green if left damp. Brass is an alloy of copper and zinc. Brass can be cleaned with any commercially
available brass cleaner. You can also find Nickel plated brass which is just brass covered with a thin coating of nickel.

Bronze (Jewelry, Armor, Trim)
Bronze is used for trim, inlays, jewelry, and armor. It's a shiny, dark copper colored metal that's an alloy
of copper and tin. It tarnishes turning darker over time. It has slightly more corrosion resistance than brass. Bronze
can be cleaned with any commercially available brass cleaner.

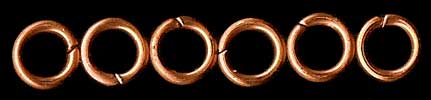
Copper (Jewelry, Armor, Trim)
Copper is used in jewelry, armor, or trim. It's a shinny, reddish colored metal. It tarnishes very
easily turning dull and darker and even green when left damp. Electrical copper wire is very soft and does not
work well for mailling. Copper must be tempered before it can be used in chainmail.
- Enameled Copper (Jewelry)
Enameled copper is a soft copper that's been coated in a colored
layer of enamel and comes in a wide variety of colors.
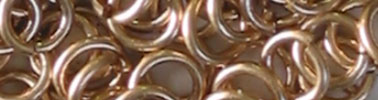
Gold (Jewelry)
Rings made with gold are either 10k solid, gold plated or gold filled. Gold plated rings have a thin
layer of gold applied. Gold fill starts with a brass core then a thick layer of gold is applied. This layer is
typically 10 to 20 times thicker than gold plating and uses 14k gold. Solid 10k gold rings are solid gold but 10k.
Inconel (Jewelry, Armor)
Inconel is one of the most corrosion resistant metals short of gold or platinum. It consists of 75% nickel,
20% chromium, 2.5% magnesium and 2.5% iron. It remains "stainless" even in environments that corrode surgical stainless.
Most chainmail will never encounter an environment that will corrode stainless steel. The strength and appearance of
inconel is comparable to stainless steel.
Magnesium
Magnesium is a mottled gray to dark metallic colored metal. It's 30% lighter and 30% stronger than aluminum.
Neoprene (Jewelry, Clothing)
Neoprene is the same durable, stretchable rubber used in O-rings and weighs 1/6th as much as steel. Neoprene
rings come in a wide variety of colors. If used like metal rings, these can only be used as closed rings since they can't
be closed if cut. Neoprene works well in bracelets that are permanently closed or in some clothing that needs to stretch.

Nickel silver (Trim, Jewelry, Armor)
Nickel silver is an alloy of copper, nickel, and zinc. It's also known as German silver. The color can be
described as stainless steel with gold undertones. This metal is fairly corrosion resistant and does not easily
tarnish although it will darken with age. Nickel silver looks good when woven with brass, bronze, copper or
stainless steel.

Niobium (Jewelry)
Niobium is strong, corrosion resistant and hypo-allergenic. In raw wire form it's a matte silver
color.
- Anodized Niobium (Jewelry)
The same as niobium except it's been anodized to form some
brilliant colors in a wide range. The anodized layer works well for jewelry but it is not indestructible.
It can wear off with rubbing against a harder material. Care must be taken with pliers and flat, smooth
pliers are recommended.

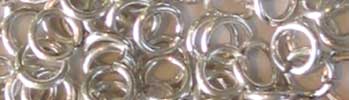
Silver (Jewelry)
Typically a very shiny, bright metal. Silver rings come in Fine silver or Sterling silver. Fine silver
is 99.9% silver and is more tarnish resistant than sterling silver. Sterling silver is 92.5% silver and tarnishes
easier than fine silver. Both can be cleaned with commercially available silver cleaners. Silver is the choice for
chainmail jewelry.
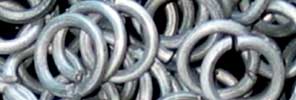
Steel
Steel is by far the most common metal used to chainmail. It can be found in the following varieties:
- Galvanized steel (most common choice for armor)
Galvanized is the best all round steel for
making armor. It's the cheapest steel, it has some rust resistance, and it is durable. It's mild steel with
a zinc layer. The zinc prevents rust even if the metal is scratched, however a powdery white corrosion
will appear if it gets wet. It will turn from a shiny silver to a dull gray over time.
- Mild steel (Armor)
This is plain gray steel and is good for making medieval looking
chainmail. It will rust if not taken care of properly. Mild steel can also be found blackened. Blackened
mild steel used a chemical process to turn the surface to a layer of magnetite. Magnetite is a very dark gray
that's turned to a deep black by a sealant.

- Stainless steel (Jewelry, Armor, Clothing, etc.)
Stainless steel is by far the choice of
material for armor as it's strong, clean, and doesn't rust. The process for blackening stainless is similar
to that for mild steel however the coating is a glossy hard coat for stainless steel.
Titanium (Jewelry, Armor)
Titanium is very light, very strong, and corrosion resistant with a matte gray finish. Titanium is 60%
lighter than steel. Titanium can also be chemically, electrically, or heat anodized to produce a wide range of
colors.

- Anodized Titanium (Jewelry, Armor)
Titanium that's been electrically, chemically, or heat
anodized. Anodized titanium colors are muted when compared to anodized aluminum colors.

Purchasing Rings
This is by far the best choice for someone just starting this hobby who's not sure if they'll stick with it.
If you prefer to make your own, you'll need your own rig for coiling wire into rings, then hand cut each ring plus
the time and expense to not only make these items but learn how to do them correctly.
If you purchase rings, you have a much greater choice of rings in different sizes and metals. This also includes
a choice of hand cut, machine cut, or saw cut rings. By purchasing rings through some of the larger ring producers,
you could start mailing within a week or less.
For those who decide to stick with this hobby and who wish to reduce their costs if going through large amounts
of rings, then coiling and cutting your own rings is the way to go. You can find recommended web sites in the Links
section that sell wire, tools, mandrels, and even some power equipment to make your own rings.
Making your own rings
Making your own rings can be very cost effective for those on a tight budget. For the purposes of this class
I'll briefly discuss the process but you'll be using purchased rings as this class focuses on how to weave rings and
not make them.
Most sites that sell rings also sell the raw wire for making your own rings. The wire is cheaper than the rings
but requires you to build your own rig for coiling and then cutting the rings, which can be time consuming.
The most basic process for creating your own rings is to find a metal dowel or mandrel of the diameter you wish
your rings to be. Near one end, through the diameter, drill a hole that's slightly larger than the gauge of the wire
you're going to coil. Put the end of the wire through the hole and then coil the wire down the length of the mandrel.
This is either done through a hand-crank system between two vertical supports or the crank handle is replaced with a
motor assembly.
The coil is now cut off your wire and off the mandrel. Next, a pair of wire cutters, the kind with the snips at
the end, are used to cut off individual rings from the coil. Depending upon the quality of the cut and the metal used,
you might need to run the rings through a polisher or tumbler at this point to clean and de-burr them.
For those interested in making your own rings, you'll find links to sites that show you how to make your own
hand-cranked coiling system or power coiling systems.
Using Rings
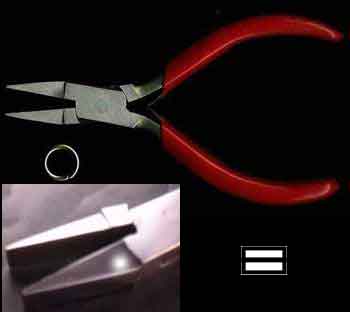
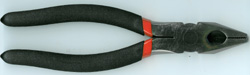
Pliers
Pliers are the main tool used to open, close and fix misshapen rings. You'll need two pair, one for each hand.
The size and type of pliers will vary depending upon your preference, ring size, ring metal, and project.
For smaller rings used in jewelry you might use a flat, wide nose pair. For anodized rings you'll want to use
flat pliers to avoid scratching the rings. For a hauberk made from larger, galvanized steel rings a pair of
toothed linesman pliers works well.
The length of the pliers also varies with the project. For jewelry and smaller projects, a pair of 5"-6" pliers
works well. For larger ring sizes such as 3/8"-14SWG or larger, a pair of linesman 8" pliers might work well. It
all depends on your strength and preference.
The main types of pliers are:
- Flat nosed
A good pair of pliers for opening and closing rings in tight places. Generally good
for lighter, smaller chainmail. Used especially for rings that you don't want to scratch such as anodized
aluminum, bright aluminum, silver, gold, and anodized titanium.
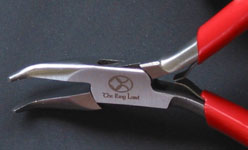
- Flat angled nose
An angled nose pliers without teeth. Good for working tight weaves. The bend
can be used to open and close larger rings while the curved point works well on smaller rings.
- Linesman
A heavy duty, wide nosed pliers with teeth. Recommended for hard to bend rings or
projects where some scratches on rings won't matter.
This is just a sample of the basic types of pliers used in chainmailling. You'll find many different types
of pliers available, such as needle nose, but the above types with either a wide nose or bent nose work the
best mailling.
Opening and closing rings
You will need two pairs of pliers. The process of making chainmail is stressful on your hands so if
you have any repetitive stress injuries do not attempt to chainmail. Most projects will require a certain number of
rings opened and closed. To speed up the mailling process, open and close a quantity before starting your project.
Opening rings
- Put the jaws of your two pliers on the ring to be opened, each plier covering 50% or more of the ring.
The break in the ring should be at the top, facing up. While applying even pressure with both pairs of pliers,
twist the right pliers away from your body while simultaneously twisting the left pliers towards your body. If
your rings have been wound and cut so that the natural break has the left part of the ring on top, then reverse
the twisting directions above.
- The ring should be open far enough to easily pass other rings through it but not open too wide. A good
opening size is slightly larger than the gauge of the wire.
Closing rings
- Put the jaws of your two pliers on the ring to be opened, each plier covering 50% or more of the ring.
The break in the ring should be at the top, facing up. While applying even pressure with both pairs of pliers,
twist the right pliers towards your body while simultaneously twisting the left pliers away from your body.
If your rings have been wound and cut so that the natural break has the left part of the ring on top, then
reverse the twisting directions above.
- The ring should be as flat as possible, and the ends as close together as possible, when closed.
- You might need to slightly over-twist your rings if they've been made from a metal that's springy.
When you release pressure, it will spring back to a flat alignment. Most of the steel rings will require
a slight over-twist.
Fixing misshapen rings
No matter how well you close rings, some will end up being misshapen from the open or close process
or were misshapen from the cutting process that made the ring. If a ring is misshapen, try gently applying pressure
across the longest part of the ring with the tips of your pliers. This should work most of the time but occasionally
you'll have a ring that you can't fix.
|