|
|
|
| |
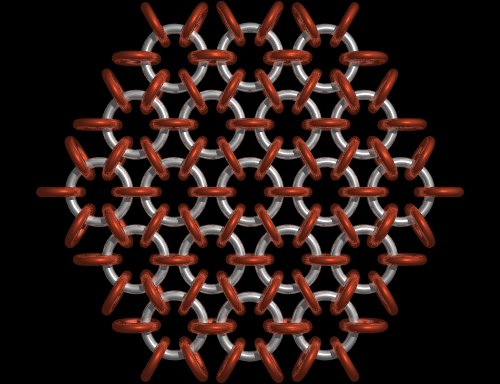
How to Weave Japanese 2/6 (Hana-Gusari Mail)
Japanese mail patterns were generally designed to be used over padded steel plates or to connect
steel plates. They're weaker than European patterns but allow for some interesting patterns given it's geometric
shape. The base of this pattern is a six link equilateral triangle ultimately forming a hexagon shape that can
then be squared offed or formed into a triangle.
Japanese 2/6 means that vertical links pass through two horizontal links and horizontal links pass through
six vertical links to form a hex-like pattern. The advantage to the Japanese weaves is that they're very fast to
make. A shirt made from an Japanese weave can be finished in far less time than one woven in a European weave.
Japanese weaves all consist of vertical and horizontal rings. The vertical rings connect two horizontal rings;
horizontal rings never pass through other horizontal rings (same for the vertical rings). In general, these weaves
look better with small vertical rings and large horizontal rings. Good ring sizes for this weave include 3/8"-14swg
large and 1/4"-14swg small, 5/16"-16swg large and 3/16"-16swg small, 1/4"-18swg large and 1/8"-18swg small, or
3/16"-18swg and 1/8"-20swg small. If you plan on speed weaving Japanese 2/6, make the small rings the closed rings.
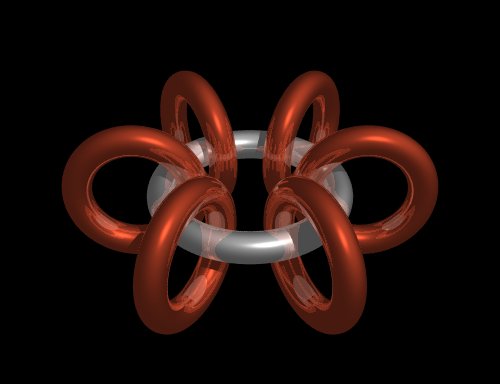
- Put six small closed rings on one large open ring. Close the large ring.
- Put five closed small rings on a large open ring. Pass the large ring through one small ring
on the other large ring. Close the large open ring.
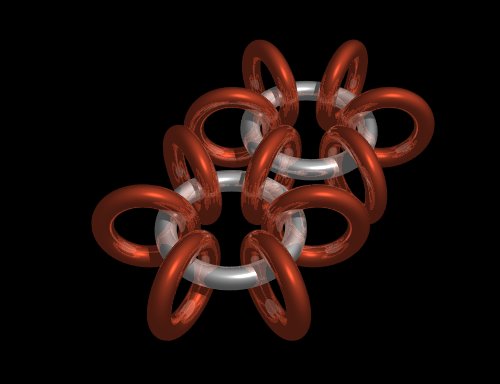
- Place four small closed rings on a large open ring. Pass the large ring through one small
ring from the first large ring and one small ring from the second large ring. Make certain that you do not "trap"
a small ring between the large rings. Close the large ring.
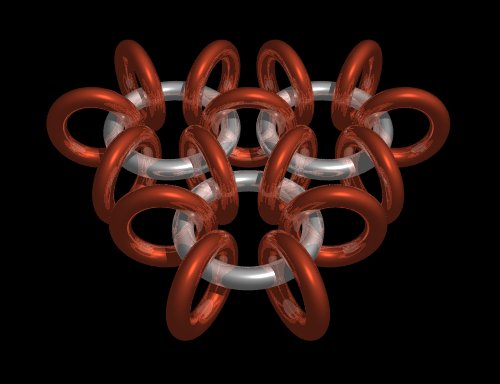
- Continue adding large rings around the central ring. Each large ring should pass through one
small ring from the central ring and one small ring from its neighbor, and should carry four small rings of its
own. The last ring, which closes the circle, will carry three small rings.
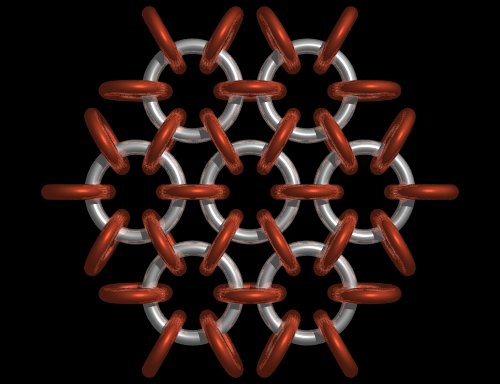
- Now we need another row in the circle or what's becoming a hexagon. The rings in this row
will pass through either two or three small rings from the previous row. Pass a large ring through three or four
small rings based upon location, then two small rings from the outer row of the hexagon. Close the ring.<.a>
The hexagon shape isn't always useful, especially if you're making clothing. Making rectangles is not terribly difficult,
but it does result in a lower weaving speed. It's better to use circles for the bulk of your weaving, and then to "square
them out" to make things fit better.
This weave is a good choice for making certain types of clothing quickly. Anything from a shirt to a bikini top to a
hip scarf is possible.
|
| |
|